Friday 27 January 2012

Corpses fields bases set

Wow! If anyone says to me that sculpting bases is a piece of cake then I would like to direct them for the New bases for Secret Weapon Miniatures... I finished and shipped them to Justin just before I travelled to the UK. I mean, these are far from easy to sculpt and took me lots of time.

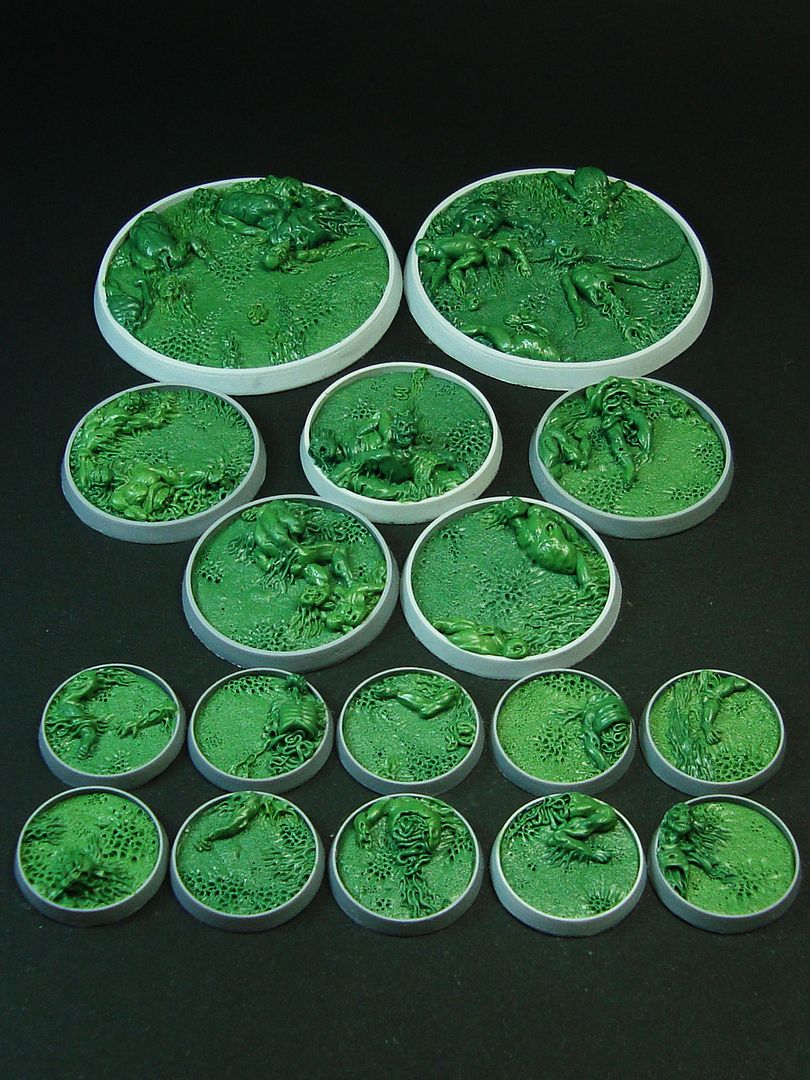
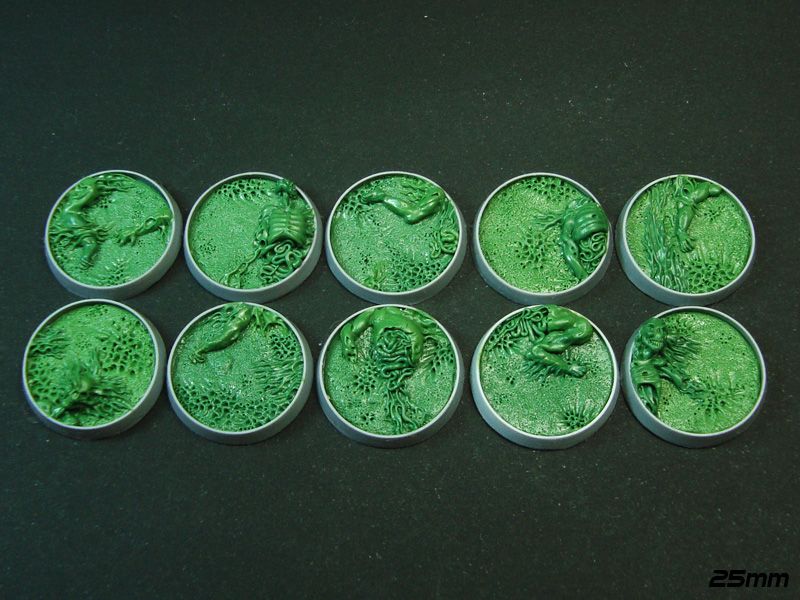
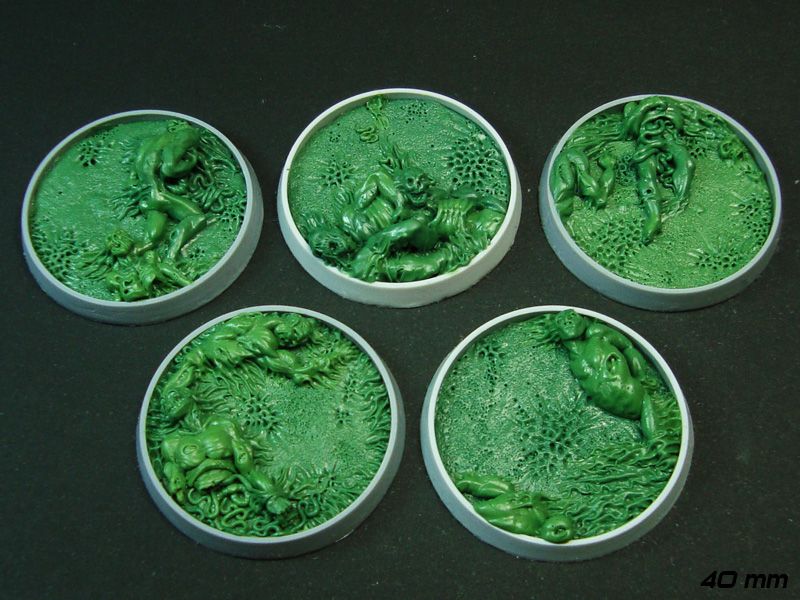
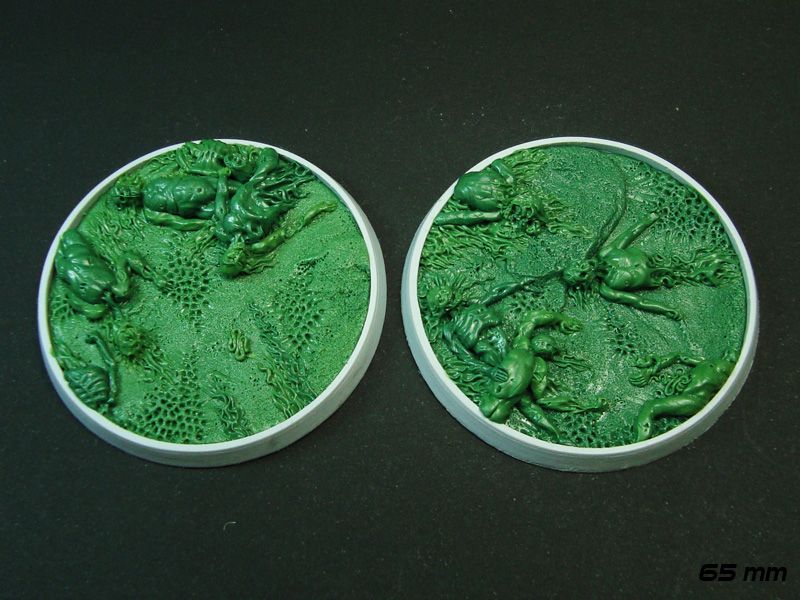
Justin approached me with the idea to create some bases filled with corpses and that the main theme should be visceral corpses, cool! He also wanted these to be done on his new bases with a hollow blank so that clients can paint these corpses and guts and still fill them in with water effects or blood gory stuff, Loved that option.

So I sculpted lots of bodies and intestines, fat zombies, rotting skulls, body parts, brains, some freaky muddy floor texture etc... Looking at all the parts I did I think I could have done literally a considerable number of full 28mm's.

So here you have it, my most complex bases to date yet I tried to keep a good surface for people to place their models in ( I do dislike those companies that make bases with so much stuff in it that you don't even have the space to put your minis in, its nuts)...

CORPSES FIELDS bases set


More new sets coming up in a near future.
With all these zombie things I do miss to watch The Walking Dead series!

PS- My sculpting gear arrived muhahahaha soon more sculpting from me.

Friday 20 January 2012

Heroquest skeleton gets Brownstuff cape.

I just had one of the most crazy weeks in my life, ever! Just unbelievable... but let's just concentrate on the hobby side of things.
Well, this week I could not sculpt anything that I had scheduled because all my portable sculpting studio did not travel with me due to weight issues at the airport so its still in transit... dammit!

I also checked out the local Games workshop one of these days at 2:30 in the afternoon and it was closed for lunch... then I came the next day and it was closed for the morning and only opened at 12:00...WTF?!
Maybe next time when the moon is aligned with the sun I will manage to actually go there and check it out...

So with no more plans for anything Hobby this week I was convinced it would be one of those weeks you don't get anything done... But when you least expect something happens!

One of my new friends over here it's also a sculptor ( and a fine good one!) and so this friday night we had something like a mini sculpting session, I had the luck to check out the minis he was doing and he even lend me some of his tools and putty to sculpt a bit. I was really missing the sculpting!

This got even more interesting when I tried some Brownstuff putty that its similar to Greestuff but has some slightly different proprieties. I sculpted a small cape on a very old Heroquest skelly he had  and I was quite impressed.
This is the little test run I did with it.


Its to early to say which putty I prefer, since I have so little experience with the new one but this may well turn out to be one of my favourite putties, its similar to Greenstuff but kind of easier to blend and bit less sticky... I need to try it out more!

So the week was saved with a bit of sculpting with friends, just brilliant!

Monday 16 January 2012

"The Eagle has landed."


"Houston, Tranquility Base here. The Eagle has landed." Neil Armstrong 

Safe landing 
Mission status -Priority one for 2012 completed.

Unfortunately the extra 5 kilos of my sculpting studio box did not make it on the plane so I have to wait a bit longer before I restart sculpting.

So it begins, my caravela drop pod landed discreetly on a mysterious island of great power and like a moth exits its cocoon I'm spreading my wings.

Tuesday 10 January 2012

New set of heads for pleasure armies conversions

Another set of 9 heads is all done and shipped to Battle Road Games & Hobbies.

The theme was pleasure heads, but Alex knowing my inclination to go wild and my love for all things Giger suggested me to sculpt something decent ( smart move ehehe)... Here's the result:


It was a pleasure :) to sculpt these and I hope all of you that are creating some themed armies enjoy these heads aimed for the 28mm market.

And these are the first 9 pieces for my personal goal of achieving 100 pieces in this year. yay!

Thursday 5 January 2012

Sculpt 100 pieces challenge

It's that time of the year that people make a balance of past year and talk about all kinds of things but since you all probably read dozens of those posts before, I will keep this very short for all.

2011 was a strange year for my hobby and super crazy for my personal life so I will just say this, the year is over and I'm glad I managed to create this blog, now lets talk about the future!

I have only 3 goals in 2012 and they are:

1- Migrate to another country with my back pack and greenstuff
2- Find a new job and reset my life
3- Sculpt not 1 or 10 but 100 pieces

I think the first one will be completed in a few days, but to keep track of my goal about the 100 sculpted pieces, I will publish on the top right corner of Mr. Bug Man blog the goal number and progress.


So the 2012 Adventure begins I'm opening my bug wings and will land where the winds take me, hope to land on all my 8 feet, keep my antenaes untangled and greenstuff fresh... this bugger is airborne!

Wish me luck!

Tuesday 3 January 2012

Tutorial: Simple bases & Sculpting Mushi for Trollbloods

To kick start 2012 here's a tutorial I did for my Trollbloods bases, the theme is mushrooms and stones and hopefully they are very simple bases to do but that are also fun to paint:

Image
Materials- 
1- Portuguese beach sand is very thin ( check aquarium stores)
2- Several types of cork... high grade Portuguese cork of diferent sizes and grain
3- plasticard sheets 0.5mm

Image
Cover the slot of the base with a bit of plasticard

Image
Pva glue all the base gap ( less is more so dont put to much or it will spill)

Image
Drop sand on it and let the pva soak everything

Image
Use your fingers to punch the sand down

Image
You can pin the mini to the cork or in this case dig a hole on the cork about the size of the tab under the feet.

Image
Check if mini fits the cork hole and if the pose is ok ( you dont want a mini looking like its falling down)

Image
Trim down the cork to fit the base... the good thing about cork is that you can pick particle after particle instead of using a xacto, so it looks a lot more like a natural stone.

Image
I use small ball of greenstuff and drop it inside the cork hole, a drop of superglue on the hole and then just insert the mini in... the superglue + Greenstuff combo is really very strong.

Image
Put some balls of GS beneath the cork and dip everything with superglue

Image
Just press it against the base and you will have done one simple base for gamming ( notice that the pva and sand on the base is still fresh so when you push the cork in you create some interesting levels on the bases)

Image
So thats it, you can stop here and you just need to paint and flock them in order to have some very simple gamming bases...

Hummmmmm... are you sure you want to stop? How about going a little step further?
Since you mixed Greenstuff for the Superglue/Greenstuff combo you should have some leftovers there... dont trash them and lets make some small mushrooms, shall we? :D 

Image
Grab a needle and a bit of GS and with the help of a clayshapper just streetch the GS in the tip of the needle making it like small cone.

Image
Make small ball of GS and put on the tip, again with a clayshapper and in the direction of the arrows shape up the top of the Mushroom.

Image
Make diferent sizes and shappes of mushrooms and let it all dry for 5 hours.

Image
After its dry just cut the neddle to the desired size and drill apin into the sand of the base and superglue the little mushrooms. Try to bend some to funny shappes and also play with diferent sizes of mushi in the bases.

Image
Image
Image
Image
Image
Image
Some bases have several others have just a few mushrooms and one none, just to make things interesting.


Now grab your brushes and have fun painting.


Cheers